Clematis is one of those garden marvels that climbs its way into our hearts with graceful vines and vibrant blooms. But when the chill of fall begins to bite and the threat of frost creeps closer, even the toughest clematis can struggle to survive. So the question is—how do you protect your prized vines from winter’s icy grip?
Whether your clematis is nestled in a container on the patio or sprawling through your garden fence, learning how to overwinter it properly can mean the difference between a fresh spring comeback… or a disappointing tangle of dead stems.
Let’s break down everything you need to know to ensure your clematis doesn’t just survive winter—but comes back stronger and more beautiful than ever.
Understanding Clematis Before Winter Hits
What Makes Clematis So Vulnerable in Winter?
Clematis may look like it can take on anything with those twisting stems, but cold temperatures, wet roots, and improper pruning can seriously damage its growth.
- Some varieties are hardy… others, not so much.
- Young plants are more fragile than established ones.
- Root rot and crown damage are common if winter prep is skipped.
Knowing your specific clematis type is key before choosing your overwintering strategy.
Know Your Type: Group 1, 2, or 3?
Clematis are generally divided into three pruning groups, and this impacts how you treat them for winter.
Group 1 – Early Bloomers
- Blooms on old wood (last year’s growth)
- Examples: Clematis alpina, C. montana
- Best overwintered with minimal pruning
- Usually cold-hardy but benefit from mulch at the base
Group 2 – Repeat Bloomers
- Blooms on both old and new wood
- Examples: Nelly Moser, The President
- Needs light pruning after the first flush
- More vulnerable to winter dieback
Group 3 – Late Bloomers
- Blooms only on new wood
- Examples: Jackmanii, Sweet Autumn Clematis
- Can be cut back hard in fall or early spring
- Generally easier to overwinter
Not sure which group yours falls into? A quick online search of your variety or a check with your local nursery can clear that up fast.
Overwintering Clematis in the Ground
For clematis planted directly in garden beds, here’s your cold-weather game plan:
Step 1: Clean Up the Base
- Remove fallen leaves and debris to prevent fungal diseases.
- Pull back mulch temporarily if you’re trimming lower stems.
Step 2: Prune (Only If You Should)
- Group 1: Skip the pruning until spring.
- Group 2: Lightly shape and remove weak or damaged stems.
- Group 3: Cut back to about 12 inches from the ground.
Tip: Always use clean, sharp pruners to avoid infection.
Step 3: Mulch Like You Mean It
This step is crucial, especially in zones with freezing winters.
- Apply 3–4 inches of mulch around the base.
- Use straw, shredded leaves, or compost.
- Keep mulch away from the crown (the base of the stem).
This insulates roots and prevents freeze-thaw cycles from harming the plant.
Step 4: Protect from Wind & Snow
If your clematis is in a wind-exposed location:
- Use burlap or garden fleece to wrap the base.
- Stake a small windbreak if necessary.
- Avoid using plastic—it traps moisture and causes rot.
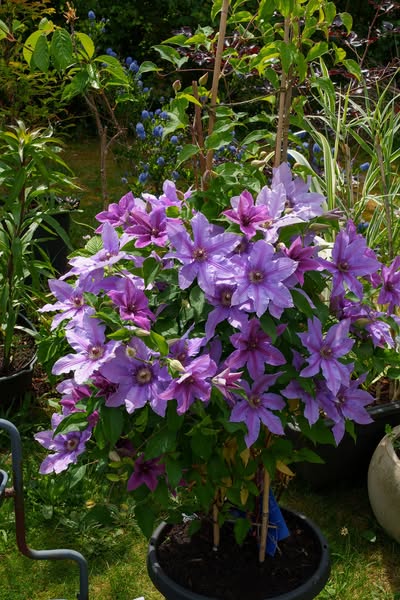
Overwintering Clematis in Pots or Containers
Potted clematis are more at risk during winter. Their roots are exposed on all sides to freezing air and lack the insulation of soil.
Step 1: Move It—But Not Indoors
Don’t bring your clematis inside the house. Instead:
- Place the container in an unheated garage, shed, or cold frame.
- If left outside, group it with other pots and wrap with bubble wrap or burlap.
- Elevate the pot off cold concrete to avoid root shock.
Step 2: Water Wisely
- Water sparingly—only when the soil feels dry a few inches down.
- Avoid soaking wet soil, which promotes rot in dormant plants.
Step 3: Insulate the Pot
Use layers for extra protection:
- Wrap the pot with old blankets, foam, or horticultural fleece.
- Add straw or leaves between the pot and wrapping for insulation.
Spring Recovery: What to Do When Winter Ends?
When days get longer and the danger of frost passes, it’s time to wake your clematis up.
Checklist for Spring Revival:
- Remove mulch gradually—don’t shock the plant.
- Inspect for winter damage—cut away dead or mushy stems.
- Feed the soil—add compost or a balanced fertilizer.
- Tie new growth gently to supports.
- Wait for new buds—sometimes clematis takes its sweet time waking up.
Common Overwintering Mistakes to Avoid
It’s easy to overlook these—but they can cost you a whole season’s worth of blooms:
- Skipping the mulch: Roots are the lifeline—protect them!
- Pruning the wrong group: Know your variety before you snip.
- Bringing pots indoors: Clematis needs dormancy. A warm home confuses it.
- Overwatering during dormancy: This leads to root rot, fast.
What About Your Hardiness Zone?
Clematis varieties range in hardiness—from USDA Zone 3 to Zone 9. If you’re in a colder zone:
- Double up on insulation.
- Choose cold-hardy varieties next planting season.
- Consider planting in the ground instead of containers long-term.